Monday, October 31, 2011

Buddy Bee and His Coupe

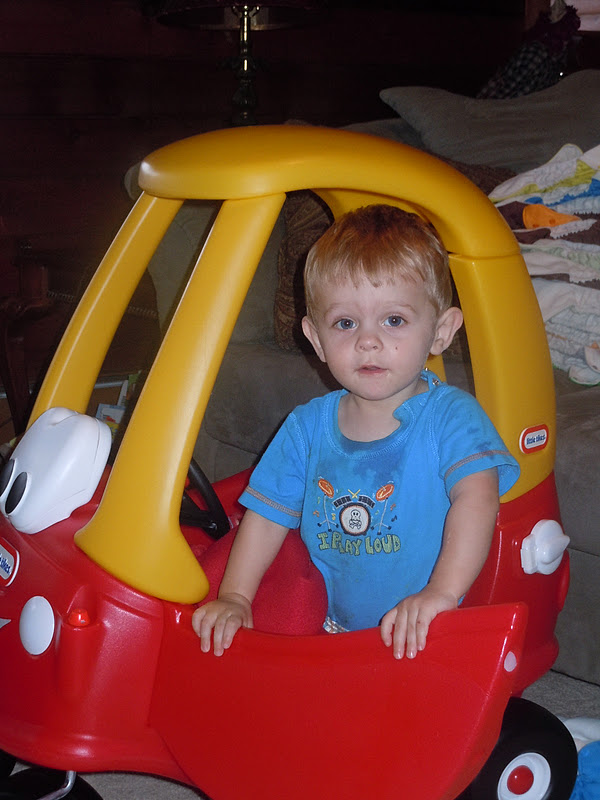
The Buddy Bee got a Cozy Coupe for his 1st birthday from our wonderful friends.  We are so blessed to have friends like them in our lives! It was so tempting to unpack it right after his birthday and let the little Bee go cruising but honestly, with all the moving boxes in our house at the time, we did not have room for it.  So, Buddy Bee's coupe moved up to the new house and sat in the garage for a few months. 


But then a rare free night came about and Daddy and the Buddy Bee were tasked to get the coupe up and running! While I was busy spray painting, Andrew and the Bee set up shop on the front proch to assemble Buddy Bee's new ride.

Buddy Bee could not wait to get in his new coupe!


Getting the coupe running took a lot longer than we expected but before bedtime our little Buddy Bee has his brand new ride to cruise around in.

Buddy Bee pushed it down the hall and got in it to take a break.
Notice the cell phone in the back....Buddy Bee was given strict instructions to not use the phone while driving!

Buddy Bee hanging out the back window.


Buddy Bee loves his new car.  It was the only toy he would play with for days after it was assembled. 
From pushing it around the house, getting in and out of it, and "driving" it around, Buddy Bee loved every minute.

Climbing in.

It amazed me how BB would open the door, climb in, and then close the door behind him without ever being shown what to do.

Climbing back out.

Driving away.


Ramming it into living room furniture!

Sitting in his coupe with his blankie.


Someone is getting tired.

Almost asleep.

Mommy told him it was time for a nap and he jumped right out to head to bed.


Buddy Bee is loving his new car!  His coupe has it's own parking space in the living room but does not stay there long.  We are looking forward to Buddy Bee enjoying his coupe for many years to come!  We are just waiting for Buddy Bee to figure out how to to make it move with his feet so he can really drive it!


Spray Paint Brought Light to the Dining Room.

Our dinning room was in need of a chandelier since we have been eating in the dark.  The original light was removed before we purchased the house.  We were not finding anything we really loved until I found an amazing deal online.

I found a $300 chandelier marked down to $60.  I think I may have found the deal of the year! The only problem was the color.  It was this creamish gold color that was called venetian gold.  It was not the perfect color but for the price I could easily change it. 

So, here is our amazing deal.

This is the chandelier already for its transformation.


A more accurate color;  a cream base with gold spekles.

We first choose a aged copper color but unfortunately it was not what I was invisioning
so we chose an oil rubbed bronze color.
We could not be happier with our color choice.


Notice the pile of empty boxes in the background....we have been busy!

Close up of the color.

And here is the beauty hanging from it's spot above our dinning room table!


We are so happy with our fantastic new light! 

Saturday, October 29, 2011

Chocolate Pretzels

I was at a women's event a couple of weeks ago and was reminded of a favorite....chocolate covered pretzels!  You can't go wrong with these little guys!  They are easy to make, oh so very yummy, and a party favorite!  So, my little Bee and I got to work making 2 lbs of chocolate pretzels for a Halloween Party we were attending. 

 
First batch done and covered with sprinkles!


My little Bee and I

The offical taste tester!


Second batch completed with sprinkles and nuts!


The Buddy Bee and I ended up making 3 trays of pretzels:

Chocolate with sprinkles

Chocolate with nuts and sprinkles

Peanut Butter and nuts

The Buddy Bee loved his chocolate covered pretzels!

Friday, October 21, 2011

Vanity Stool Project

We found an awesome vanity at a yard sale this year but it came with this eyesore...


I had plans to use left over fabric from my headboard project to make this cute little stool look it's best!

I first removed the seat from the legs of the stool.

I did not need to add any batting so, I left the old fabric intact. 

Next, I would start stapling the new fabric onto the seat.

Then I reattached the seat back to the legs. 
My project only took about 20 minutes and then I had this beauty...


I personaly think it looks fabulous with the vanity.
Minus the nasty blue carpet with our gorgeous teal walls.


It's a horrible picture but I love how the teal in the fabric really pops.